How to DIY a LiFePO4 Battery Pack: A Step-by-Step Guide to Building Your Own Reliable Power Source
Building a LiFePO4 (Lithium Iron Phosphate) battery pack is a practical and fulfilling project, whether you're a DIY hobbyist or someone in need of a reliable custom power solution. Understanding the fundamentals of these batteries and the assembly process is key to creating a safe and efficient energy storage system that meets your specific requirements.
LiFePO4 battery pack key parameters
Understanding the key parameters of your LiFePO4 battery pack is crucial for ensuring it meets your needs. Here are the primary parameters to consider:
· Voltage (V): This is the total voltage of the battery pack, determined by how many cells you connect in series. For example, four cells in series, each with 3.2V, will give a total voltage of 12.8V.
· Capacity (Ah): The capacity of the battery pack, measured in ampere-hours, depends on how many cells are connected in parallel. If each cell has a capacity of 10Ah and you connect four in parallel, the total capacity will be 40Ah.
· Energy (Wh): This is the total energy stored in the battery pack, calculated by multiplying the voltage by the capacity (Wh = V x Ah). For instance, a 12.8V battery pack with a capacity of 40Ah will have an energy capacity of 512Wh.
· Max Discharge Current: The maximum current the battery pack can safely deliver. It’s influenced by the specifications of the individual cells and the BMS. Exceeding this current can damage the cells or reduce their lifespan.
· Cycle Life: Cycle Life refers to the number of complete charge/discharge cycles the battery can undergo before its capacity falls below a certain percentage of its original capacity (usually 80%). A higher cycle life means better durability and longer service life.
Understanding these parameters helps you know what your battery pack can and cannot do and ensures it will meet your power requirements.
How to DIY a LiFePO4 battery pack?
Building a LiFePO4 battery pack involves several steps. Here’s a detailed guide to help you through the process:
Step 1: Gather Materials
To build your battery pack, you will need the following materials:
· LiFePO4 Cells: The number of cells depends on your desired voltage and capacity.
· Battery Management System (BMS): Essential for monitoring and balancing the cells, preventing overcharging and deep discharging.
· Connectors and Wires: These are used to link the cells together.
· Insulating Materials: To ensure that there are no short circuits.
· Battery Case: To house and protect the battery pack.
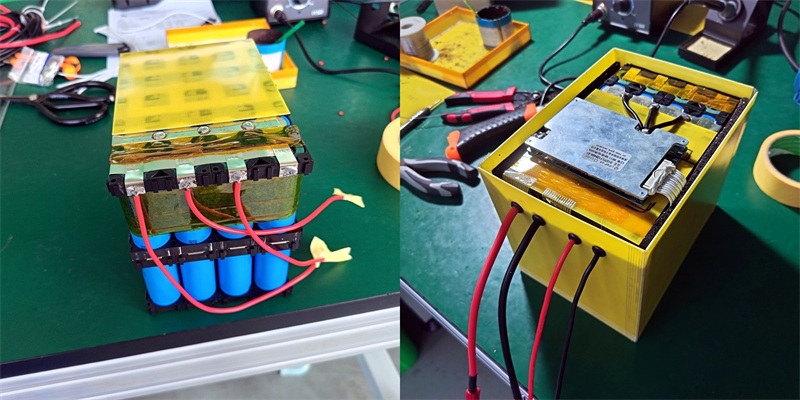
Step 2: Arrange Cells
Decide on the configuration of your battery pack (series or parallel). Place the cells accordingly in a secure and insulated environment. For example, arrange four cells in series if you want a 12.8V pack.
Step 3: Connect Cells
Connect the cells using solid connectors or wires. Ensure that all connections are tight and well-insulated to prevent short circuits. If you’re building a pack with both series and parallel connections, be clear about which cells are connected in series and which in parallel.
Step 4: Install BMS
The Battery Management System (BMS) is crucial for the safety and efficiency of your battery pack. Connect the BMS to each cell as per the manufacturer’s instructions. The BMS will monitor the voltage and temperature of each cell, balancing them during charging and discharging to ensure longevity and prevent damage.
Step 5: Secure the Pack
Place the assembled cells and BMS into a battery case. Ensure that all components are securely fastened and there’s no movement inside the case. Proper insulation is critical to prevent short circuits and ensure the safety of your battery pack.
By paying close attention to these parameters and following the assembly steps carefully, you can create a LiFePO4 battery pack that is both efficient and durable. A well-built battery not only delivers reliable performance but also ensures safety throughout its lifecycle. Whether for an e-bike, solar storage, or a portable power setup, your DIY LiFePO4 pack can be tailored to fit a wide range of applications.